I’m BACK! And I’ve been BAKING!

Hi blogging family,

It has been a long time since I’ve logged in to my wordpress account. So much has changed. When I was blogging in 2014, I was just graduating college and excited to join the workforce. I did that, I worked for 6 years in the event / tradeshow world and now in the midst of a global pandemic with COVID-19! I am now unemployed and finding time to put energy into things I love. I have been baking a lot but have not blogged about it at all. I am excited to get back into sharing my baking stories with you all. It’s been a long time coming. My intention with this blog is to share my baking experiences, crafting fun and recipes with anyone and everyone who wants to listen and learn. I also would love to grow my blogging baking community! More to come. Stay safe and stay inside! 🙂

Fall Has Arrived – Pumpkin Style!

Well it is officially Fall! Get ready for holiday foods, winter boots, family get togethers and…. of course pumpkin products at almost every grocery store! I’ve never baked pumpkin bread before and decided to give it a go the other day since I remembered I had a can of pumpkin purée in my pantry from the time I attempted (but did not execute very well) pumpkin cinnamon rolls. All the other ingredients in pumpkin bread are pretty much staple products most frequent bakers would have. You can find this original recipe at: cupcakesforbreakfast.com


I’m happy to report that my first attempt at pumpkin bread turned out amazing. I heard great reviews from family members and coworkers. I baked two loaves and 6 muffins. The only thing I’d do differently next time is to wait a little longer for the bread to cool so the powdered sugar doesn’t melt. I sprinkled it on the top of the bread and muffins a bit too early, so next time I’ll be more patient, and wait a bit longer. I really love this recipe because the bread is not too sweet, it’s subtle and so it the pumpkin flavor. You know it’s pumpkin bread but the taste is not overwhelming artificial (you know what I’m talking about). Also, this bread came out so moist! Oh my goodness, it taste so delicious. It was hard for me to give it away, but it’s important to share the wealth (and get others peoples opinions). Here is the recipe, enjoy and share it with the people you love.

Pumpkin Bread
Makes 2 loaves
Bake time 60 min
Oven Temp 350 degrees

3 1/2 cup flour
2 teaspoons baking soda
1 1/2 teaspoons salt
2 tablespoons pumpkin pie spice (or a mixture of nutmeg & cinnamon)
1 (16oz) can of pumpkin purée
1 cup vegetable oil
2/3 cup water
2 teaspoons vanilla
2 1/2 cups sugar
4 eggs

Line both pans with parchment paper or coat with cookie spray or butter. I greased the bottom of the loaf pans with butter and then put parchment paper on top. With the muffins I just greased it with butter.
First in a bowl combine all dry ingredients (flour, baking soda, salt, and pie spice). If you don’t have a sifter you can always use a whisk to get the lumps out. Set this bowl aside. Preheat oven to 350 degrees.
Then in a large mixing bowl add in all the wet ingredients. In no specific order. I think I added the purée first and the eggs last. Mix together with mixer or use spoon however if you use a spoon make sure all the ingredients marry together. Once all the wet ingredients are fully mixed together, go ahead and add in the dry ingredients 1/2 a cup at a time. You don’t want to overwhelm the mixture with too much flour too quickly. Once you have added in all dry ingredients, and mixture is well combined you can pour into two separate loaf pans. Or in my case 2 loaf pans and a 6 tray muffin pan. I made muffins for myself because it’s quicker in the morning to grab a muffin rather than cut into a loaf. Not much quicker but when you wake up at 5am and have to be out the door by 6:15-6:30am it’s just easier to grab and go rather than cut, grab and go… You get my drift. 🙂

Anyways, bake loaves for 60 min, check on it 45 min to see the progress. After 60 min stick fork in the middle of the loaf and if it comes out clean, it’s done! The muffins only took 15-20 minutes. Let cool for 25-30 minutes then sprinkle powdered sugar on top… So delicious. Eat and enjoy my friend, watch out though because this is a crowd pleaser!photo 2

Cake Batter Oreo Cookies

Cake Batter Cookies


HAPPY LABOR DAY! And happy first of September! Let me start by saying if you are a fan of Oreos and cake then this is the cookie recipe for you. As my friend Sarah said, this is a cookie in a cookie. I originally made these a month or so ago and gave some to my friend Eric for his birthday and my Uncle Renzo because he loves cookies. They were a huge hit, and this time around I made some for my girlfriends to go along with other snacks before we went wine tasting in Livermore for my birthday! All in all, wine tasting was pretty spectacular, everyone had a great time and we got to see another piece of the Bay Area that I am pretty sure, a lot of us had no idea wineries existed there. Thankfully my cousin Diana is a fabulous party planner and set a whole day of tasting up. Livermore has over 50 wineries, who knew? We hit up three of them, Rios Lovell, McGrail Vineyards and Wineries, and Fenestra, all located in Livermore, CA and reasonably close to one another. I feel so blessed to have such great friends and family around me, who support me. A lot of my friends I have known since I was in 4th or 5th grade, some younger. I will never forget this weekend and the shenanigans we got into. Here are couple pictures from the wine tasting/birthday celebration (YAY I am 25!).

Rios Lovell Winery

Rios Lovell Winery

McGrail Vineyards and Winery

McGrail Vineyards and Winery

Fenestra Vineyards and Winery

Fenestra Vineyards and Winery

Fenestra

Beautiful ladies at Fenestra Vineyards and Winery


 Anyways, back to this cookie recipe. I originally found this recipe on Sally’s Baking Addiction Blog and you can find the original recipe here: http://sallysbakingaddiction.com/2014/03/01/cake-batter-oreo-cookies/


Cake Batter Cookies  

Ingredients:

1 and ¼ cups all purpose flour

1 and ¼ cups yellow or funfetti boxed cake mix

½ teaspoon baking soda

34 cup unsalted butter, room temp

½ cup sugar

½ cup light brown sugar

1 egg, room temp

1 and ½ teaspoons vanilla

1 cup semi sweet chocolate chips

½ cup sprinkles

10-12 Oreos, crushed (you can use any flavor)

 Cake Batter Cookies

Instructions:

In a bowl combine all wet ingredients – flour, cake mix, and baking soda. Set this bowl aside until later. In a mixing bowl start by creaming your butter on the lowest mixing speed. Cream your butter for about a minute and then add in your sugars. Mix on medium speed for a couple minutes then add in one egg. Mix until well combine on low and then add vanilla. Make sure the batter is all mixed together before adding in the chocolate chips, sprinkles and Oreos. You can add in the chocolate chips, and sprinkles and crushed Oreos, mix with a mixer or baking spatula just until well combined.

Seal the bowl with plastic wrap or foil. *Now refrigerate your dough for 2 hours* This is crucial to the baking process. Refrigerating your dough will help the cookies keep their shape when baking, rather than melting all over the pan and becoming lifeless shapeless cookies (which I have made before, they still taste good but look terrible). I think it is better for the overall goodness of the world if you do this step, it just requires a little planning head. Plus you can do a lot in the 2 hours the dough is chilling. Preheat the oven to 350 degrees and start scooping your dough out and making small cookie shapes. The bake time can vary from 8 – 12 minutes depending on your oven. My cookies took exactly 10 minutes, they were light brown when they came out of the oven. Remember they will continue to bake once they come out. Let them cool for 10 minutes or so, then eat and enjoy!

Cake Batter Cookies 5

Cake Batter Cookies

Life Update

Hello readers, bloggers, friends and family,

Just wanted to post a quick update about my lack of blogging for the last month. As you can see my last post was in mid July and it is now August 29th. This summer has been busier than usual, and a lot of things have changed for me. This summer all of my sisters (I have 3, all younger) came home to the Bay Area. Lauren is 22, and recently graduated with her BS from Humboldt State. Paige is 20 (her birthday just passed on August 26th) and goes to college in Ohio, and Laisani is the youngest and at 16 years old lives with my mom in Washington DC. I also have a younger cousin Samantha who is 16, and best friends with Laisani. Sam is a lot like me, positive, sweet, kind hearted and a little dramatic. Anyways, it goes without saying that when they come home all I want to do is spend time with them, whether we are out and doing something new and exciting or just hanging out at my grandmothers which is the main center of love for all of us. We have a lot of family so this summer has been filled with BBQs and birthdays and weekend trips. About a week ago they all left to go back to their lives elsewhere, while my grandmother and I continue on with our lives here. It is always hard to say goodbye to them, but I know it is just temporary. My sister Lauren landed an internship in Humboldt so she has to go back. I will miss her a lot because since we are so close in age and share my car when she is home, we operate like a team. We are always working together, whether we are coordinating rides or just cooking dinner together. I will miss her a lot. Paige is a little bit more selective in the info she gives out to the family. She is quiet. Laisani si similar to me, we talk to everyone. My mom, Laisani and I are social creatures. When they leave I always have a hard time adjusting back to the routine of not having them around. I look forward to the day when they are all home for good.

On top of having my sisters home, I was also taking the last quarter of school I have left. I walked at the graduation ceremony in the Spring, but still had a few units to finish up this Summer. The online course I was taking (quantitative research) was a lot harder than I expected but I put in the time/effort and learned a lot. The other two courses I took were Writing and Design, and Organizational Behavior. I liked both classes, but balancing school, work and family is not easy.

While being in Summer school, I was also searching for a new job. The current company I work with is great, but I am only working part time. Luckily about a week before school ended I went through the interview process an event production company, and things worked out! Both the interviews I felt went great and I left knowing this company would be a great fit for me. I start the first week of September. Really excited about it! Below are some highlights from this summer. Promise I will be blogging more very soon!

SUMMER HIGHLIGHTS:

Graduation!

Grad Party w/ All My Family and Friends

My Sisters Being Home

Weekend at the Lake With Family

On The Run Tour 2014 Jay Z and Beyonce

Cousin Chase’s 9th Birthday

San Diego Trip

Landing a Job!

My Birthday and Celebrating with Family + Friends

Purple Cabbage Potato Salad

It is no secret that I love BBQs and BBQ food! I think this is because I am a summer baby, I am born in late August (the 28th) and ever since I can remember my birthdays have always been BBQs in the park or at the pool. My family also knows how to thrown down on some BBQ ribs, chicken, links, Mac cheese, potato salad, baked beans, sweet potatoes and any other grilling food you can think of. Because I have such a big family, lots of cousins, aunts and uncles, having a BBQ has just been an easy way to feed so many people. Over the years, my mom and dad have gotten pretty good at it. Plus, the way my family feels about food, usually everyone brings a dish to share.

Last night was my Auntie Nancy’s birthday. She is the youngest of the siblings on my mother’s side. Her favorite food is fried chicken, so my uncle decided he would fry the chicken and everyone else can bring the side dishes plus cake. My sister Lauren put her foot in some Mac Cheese (the leftovers I will devour later) and I made baked beans and potato salad. My youngest sister Laisani make a homemade Strawberry Short Cake and my Aunt Carmen brought over a Double Chocolate Cake. My Grandmother baked a key lime pie, with homemade crust and it was so good! So we had a good filling dinner last night. I always love it when Lauren makes her Mac Cheese because it is a recipe that has been passed down from my Mother, who makes it really REALLY good. I don’t think I can make it as good as they can YET. Dinner was great and there were minimal leftovers. I think Aunty Nancy had a good birthday and felt very loved.

The recipe for the Potato Salad was one I created myself as I was in the grocery store. The night before I had looked a few different recipes, and was originally going to go with one I found. But when I got to the grocery store my cell phone service was acting up so I decided to free hand the ingredients picking up whatever I thought would be tasty together. I knew I wanted to use red potatoes, and hard-boiled eggs. I was going to use Greek yogurt instead of mayonnaise, but decided against that idea last minute. Knowing my family, for this special occasion they’d want the real deal, no healthy versions necessary.


INGREDIENTS:

8 – 9 red potatoes

6 boiled eggs

½ of a Small Red Onion (chopped)

1 bag shredded Purple Cabbage

¼ cup Chopped Dill

2 Cups Mayonnaise (I used one made with olive oil)

1 Cup Sweet Relish

Salt and Pepper


INSTRUCTIONS:

First I filled a pot ½ way full with water, then put it on the stove to boil. I then washed the potatoes and cut them into fourths. They will boil faster if you cut them previous to boiling. Carefully place the potatoes in the boiling water and let them cook while you cut up the other ingredients.

In a much smaller pot, boil water for the eggs. Place eggs in boiling water and let cook for 7 to 10 minutes. Turn off burner and let eggs sit in hot water until you are ready to peel.

On the cutting board dice up the onion, I only used half of one, but I am sure if you’d like you can use the whole onion. Keep in mind I did buy a small onion opposed to some of the gigantic ones they sell at the grocery store. It all depends on your preference. The cabbage is already shredded, but I gave them a quick chop as well. Then I chopped up the dill, and although I didn’t measure I think I use about ¼ of a cup. You can always add more.

Once the potatoes are boiled which takes about 20 to 25 minutes. I strained them, then ran cold water over them to stop the potatoes from cooking. I let the potatoes cool for about another 15 to 20 minutes before I seasoned them with salt and pepper.

After I seasoned them I put all the potatoes on a large bowl so that I could mix all ingredients in easily. I added in the onion, cabbage and dill. Gave that a mix, then added in the 1 cup of mayo. Then add half a cup of sweet relish.  Stir in the rest of the mayo, then finish it off with the rest of the sweet relish. Remember the eggs you boiled earlier? Run cold water over them before pealing and cutting up. I always add the eggs last because they are so delicate. Mix the eggs in and add more salt and pepper. Mix all together and there you have it – Potato Salad! Be sure to taste it before you serve it, it may need more relish, or salt, tasting your food is key to knowing if it is ready to serve or needs something extra. You can store this dish in the fridge until ready to serve.

My family loved this potato salad, even my Grandma Delores who has her own Dill Potato Salad recipe that I have yet to try and make myself. I love that the purple cabbage adds lovely color, the sweet relish give it that sweet pickle taste.  I hope you enjoy this dish as much as I do!

photo1 (2) 

Chocolate Pecan Bars!

Bars - Feature

So, let me start by saying that my sister, Lauren, said she liked these bars more than my chocolate pecan pie (which I make every year for Thanksgiving, and has become a family tradition). When Lauren said that, I knew I had a winner. After trying them, I couldn’t help but ALMOST agree with her. They are similar in taste, but with more of a shortbread bottom layer opposed to crust. I also use semi sweet chocolate chips for the bars, and unsweetened chocolate for the pie so there are a couple differences.
The reason I chose to make chocolate pecan pie bars is because I was going over to a friend’s last night and wanted to whip up something relatively simple and also using ingredients I already had in the pantry. I originally wanted to make bars that used fresh fruit, but because I didn’t plan ahead I didn’t want to risk going to the grocery store and not finding ripe fruit. Instead I remembered a recipe I found a couple days earlier while browsing Pintrest (like many of us do). The original recipe is from Jam Hands and can be found here below: (http://www.jamhands.net/2008/11/chocolate-pecan-pie-bars.html)
I would say this is a treat that you can bring to any party, and it was a hit at the dinner last night. I think they are very decedent and I am not sure if you will have enough will power to only eat one. I think I ate two yesterday, maybe two and a half. ☺ One of the things I love most about this recipe is the shortbread bottom layer, this may have happened accidentally because I doubled the recipe for the bottom layer so that the ingredients filled the pan. I used a 13 x 9 size pan, and when I made the first batch of the “crust layer” I found myself half a pan short of crust. So, I told my sister to make another batch. Luckily it worked out and came out delicious and even better than I expected.

Bars - Side View 2 
 
Bars - Feature

Bake Time:

Crust: 20 – 25 minutes
Bars: 25 minutes
Bake Temp: 350 degrees (9 x 13 pan)

INGREDIENTS:

Crust Bottom Layer –
2 sticks unsalted butter

½ cup brown sugar

2 ½ cup all purpose flour

1 teaspoon salt

Top Layer
3 eggs

¾ cup light corn syrup

2 tablespoons melted butter

½ cup sugar

2 cups semi sweet chocolate chips (you can always use less if you’re not a huge chocolate fan)

2 cups chopped pecans

INSTRUCTIONS:

Preheat the oven to 350 and line the baking pan with aluminum foil. Spray the pan before you are ready to put in the crust layer.
In a mixing bowl, beat two sticks of room temperature butter, then add in the brown sugar. In ½ cup increments add in the flour, and then the salt. The mixture should be course crumbs. Place crumb mixture into the pan and press firmly. Try and make it so this layer is pressed in the pan as evenly as possible to ensure correct baking time. Bake this for about 20-25 minutes or until the top is golden brown. Let cool for 10 to 15 minutes before pouring on the top layer. Remember that different ovens will have slightly different baking times. Also you will be baking this again once you pour the top layer on so try not to over bake.
In the same bowl mix together the eggs, corn syrup, sugar and two tablespoons of melted butter. After that is mixed together, fold in the chocolate chips and pecans. Pour mixture onto the crust layer and spread evenly. I tried to make it so every part of the crust layer had a good amount of chocolate chips and pecans.
Bake bar for 25 minutes, and then let cool completely before taking out of pan. The foil helps to remove the bars from pan ever so nicely. Place bars on a cutting board once cool and then cut into squares. Then eat and enjoy.

Bars - Extra Bars - Foil

Bars - Feature

Chocolate Raspberry Banana Muffins

Image

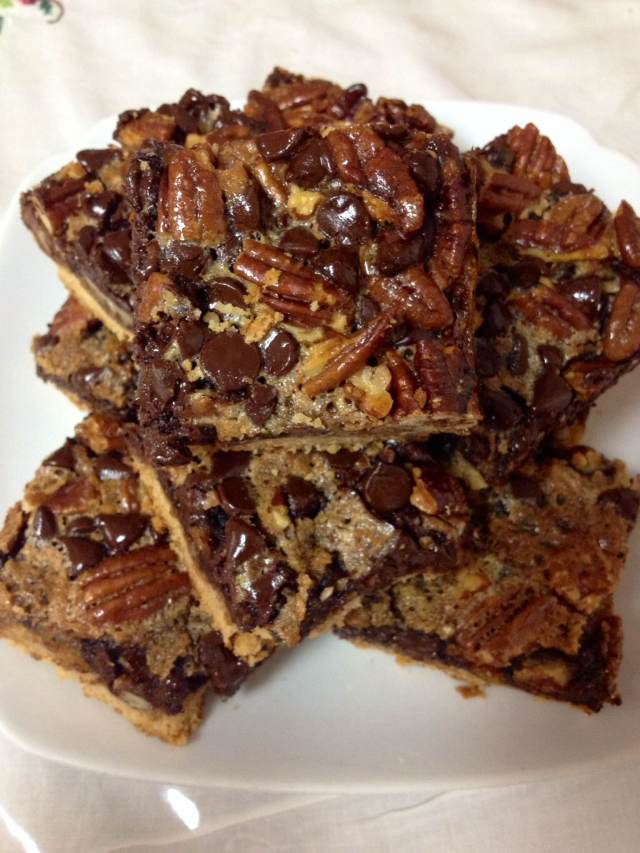
Well, it is no secret that I love chocolate and as of lately I have been on a chocolate baking binge. Don’t get me wrong, I enjoy a variety of desserts but chocolate is by far my favorite. It seems like ever since I was a little girl I’ve had a sweet tooth and a huge love for dessert. I think this is partially what inspired me to start baking. I wanted to know how to make the things that I love so much.

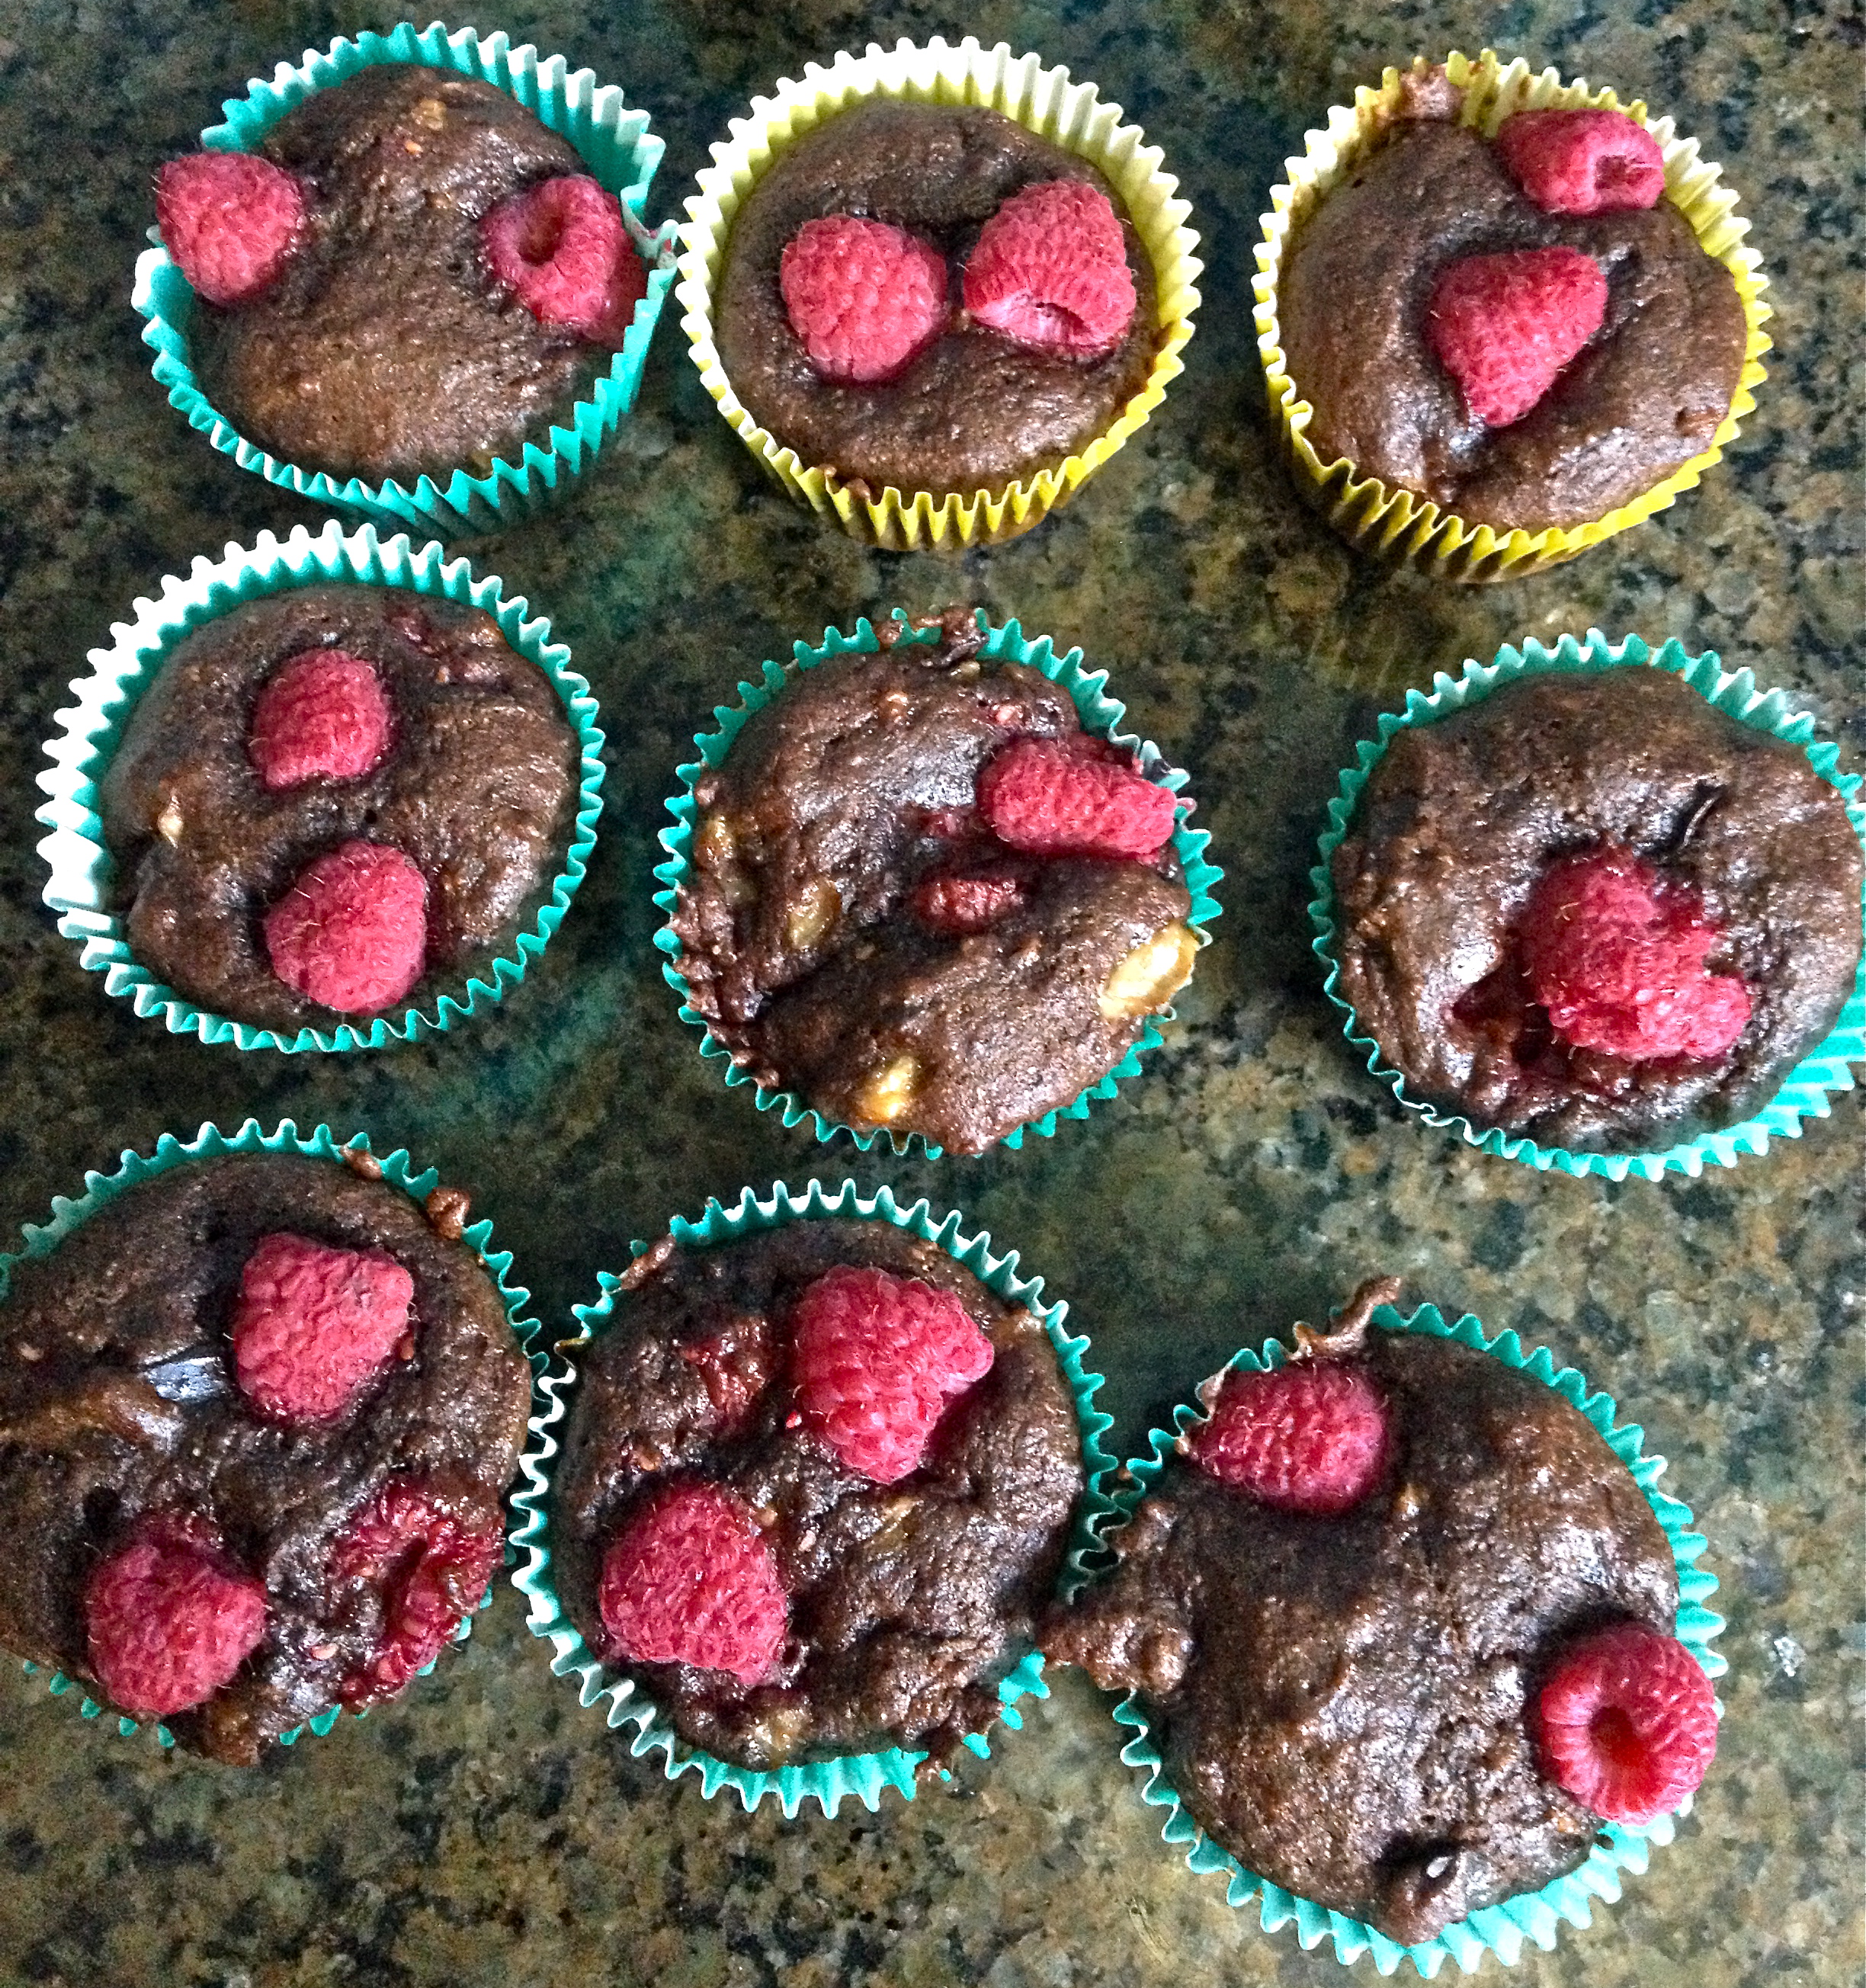
A couple days ago I bought ripe bananas at the grocery store with the intention of baking banana nut bread. BUT as I was looking at different recipes on Pintrest, I decided that I wanted to also include chocolate chips that I had in my pantry, and then I remembered I had a package of raspberries in the fridge, so I had to include those too! Suddenly most of the recipes that were popping up on Pintrest were for chocolate banana bread with raspberries and chocolate chip. I was thinking to myself – what did I get myself into? I usually prefer fewer ingredients, simple but bold flavors, but I couldn’t pass up the opportunity to try chocolate raspberry banana muffins out and see how they tasted. Even though I was unsure about chocolate banana bread, I figured – why not.

Other than loving baking because of my initial curiosity with desserts, baking also makes me feel like I am doing right. It gives me this rewarding feeling and pleasure that I might make someone else happy with this dish or recipe. Food is a huge part of my culture (I’m Pacific Islander and Chinese) and I have a lot of family/friends who share the same pleasure and love for a great food, from appetizers to desserts! It is an awesome feeling knowing that someone appreciates the time and effort you put into making something. I get a similar satisfaction when blogging. All the research and recipe testing that goes into the perfect combination of ingredients and flavors, plus the photo editing and then drafting the content. Blogging is a lot of work, on top of actually doing what you are blogging about! However the feeling I get, once I share one of my post on Pintrest or Instagram, this feeling of happiness comes over me and I feel good about myself. That is why I continue to bake and blog because it inspires me and if it also inspires others too, that’s wonderful.

Currently, I’m in the process of deciding an official name that fits this blog. I have come up with so many options but nothing rings true to me. I am also in search of a graphic designer/blog designer to create a original template for me. So there are some changes coming to BrianaVeniana.com, including a name change (pretty sure, but not officially). Also, I am realizing more and more that perusing something that makes me happy is far more important that anything else. Happiness is key and success is subjective. Everyone has their own definition of success, and what makes life great to me is accomplishing goals that I set for myself. Creating this blog, and consistently updating it is one of my goals. Writing great content and producing professional photos is also on my list. Slowly but surely, I am getting there. Sometimes it is easy to get caught up in how far you have to go, than looking at how far you’ve come… can’t remember who the author of this quote was.

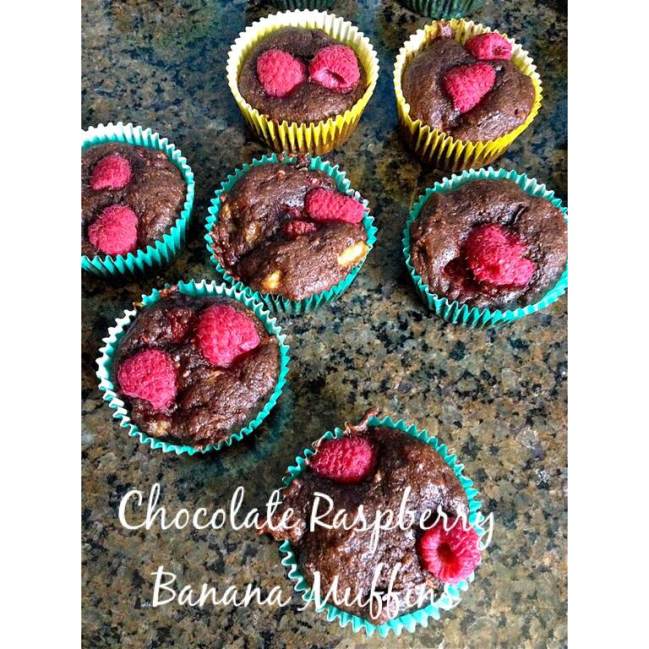
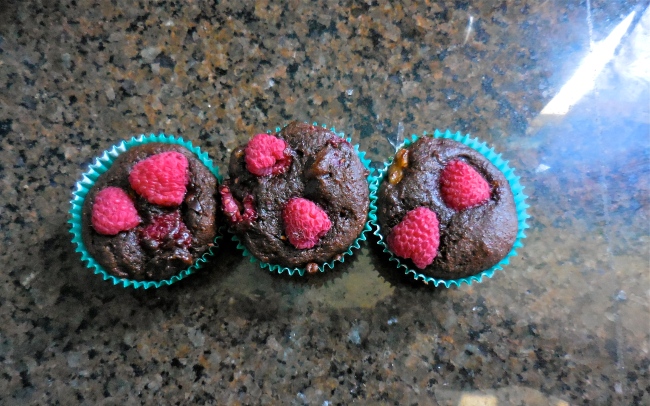
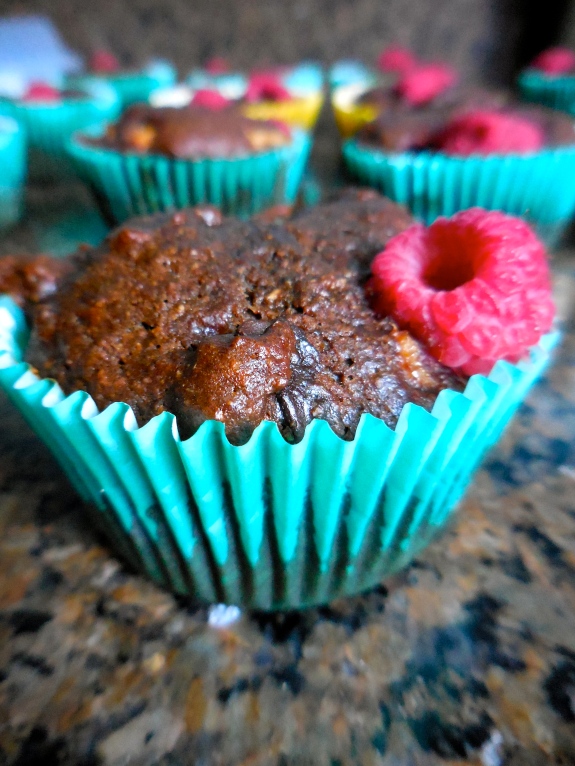
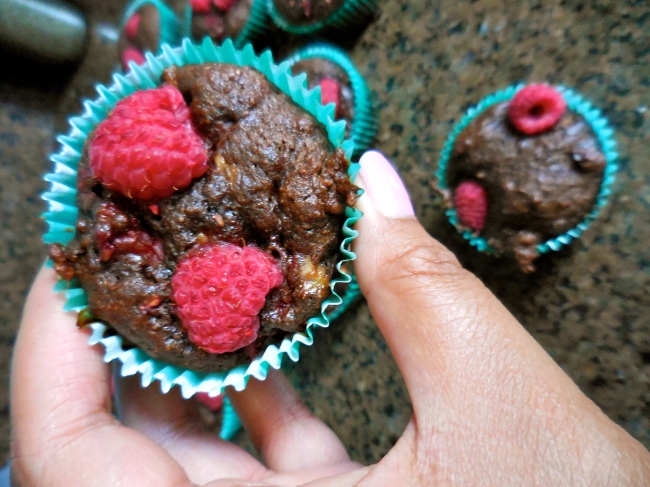
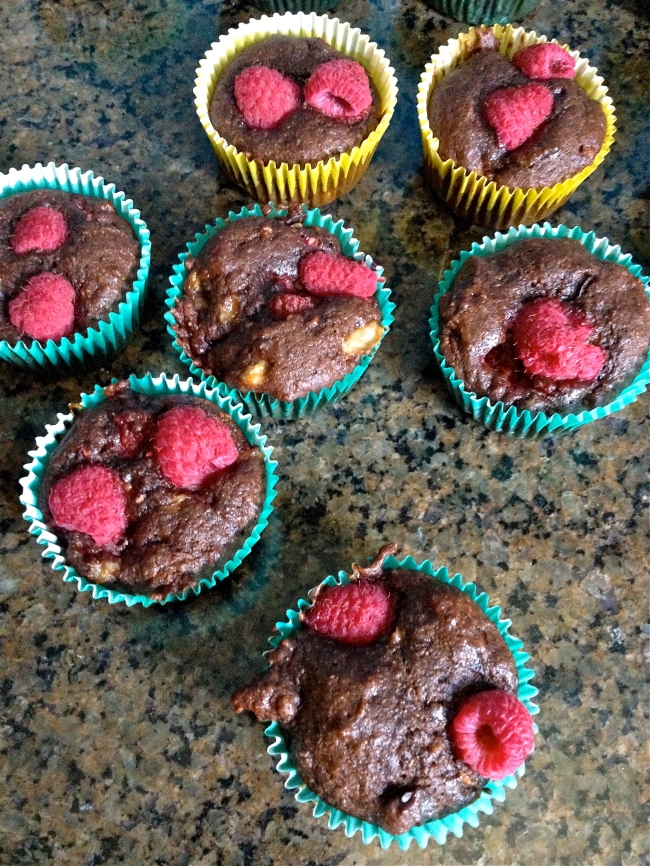
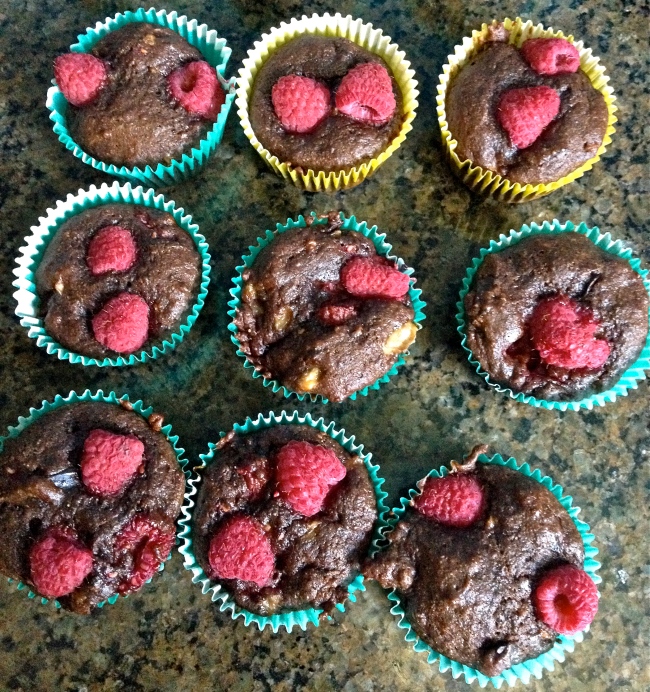
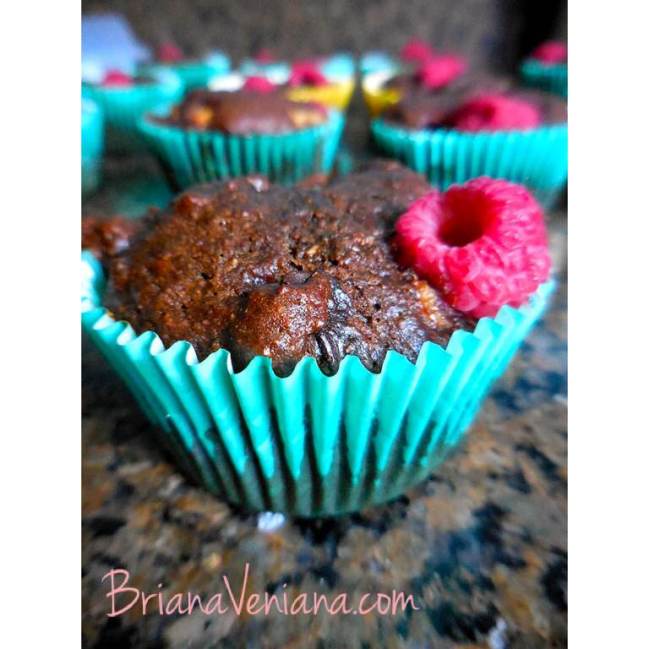
Anyways that is enough of my ramblings, without further a due here is the recipe for Chocolate Raspberry Banana Muffins that came out pretty spectacular. Based on reviews from my sisters the muffins are not too chocolate-y and you only taste a hint of the banana. The raspberries are really the start of the show, and the chocolate chips pretty much melt into the batter. Next time I may try dark chocolate chips instead of semi sweet. This batter will come out thick and lumpy, so don’t expect a liquid like batter. Also, I bought another pack of raspberries from the store, so I could garnish the muffins with them but ended up putting 1 or 2 raspberries on top of the muffins once they were in the muffin pan.

Image

Image

Chocolate Raspberry Banana Muffins

Baking Temp: 350

Baking Time: 20-25 minutes

INGREDIENTS:

1 cup whole wheat flour

½ cup all purpose flour

¼ cup cocoa powder

¼ teaspoon baking powder

1 teaspoon baking soda

1/4 teaspoon salt

1/3 cup vegetable oil

1 egg

1 1/3 cup bananas (mashed)

1 cup raspberries

¾ cup chocolate chips (semi sweet or dark chocolate)

INSTRUCTIONS:

In a large bowl whisk together flours, cocoa powder, baking powder, baking soda and salt. Set bowl aside.

In a separate bowl mix together the mashed bananas, vegetable oil and egg.

Pour wet ingredients into dry ingredients and mix together. Mix together until all ingredients are combined, remember that the batter will be lumpy and this is okay.

Fold in the chocolate chips and the raspberries. Do not over mix the batter or else muffins will come out tough.

Pour batter into muffin pan ¾ of the way full, then bake in the oven at 350 degrees for 20 to 25 minutes.

Let cool for 15 to 20 minutes and enjoy with people you love.

Image

Image

Image

Image

[Guest post II] : Tips for Pastry Photography

Great advice for bloggers who are wanting to step up their photography game. I am not quiet there yet, as I am still taking photos with my iPhone and Nikon CoolPix but I love having advice from other bloggers on things that can help me in the future.

mydearbakes

Yes! We now have our 2nd guest writer on mydearbakes!

We are very fortunate to invite Kiki of dinnerfornone to share with us some tips on pastry photography. =)

We recommend you to swing by her blog to check out Kiki’s creation.

And now, with out further ado … let’s sit back and enjoy the post!

When Lynn contacted me to ask whether I’d be interested in doing a guest post about pastry photography here on mydearbakes, I replied saying that I’d be interested but that I have a very unprofessional way of taking pictures, and outlined what I could write about. She still wanted me to do it, so thank you very much, Lynn! I feel very honoured to be chosen, and I’m still a little baffled, too!

So, welcome to my non-technical guest post. I would like to share a few tricks I’ve learned along…

View original post 1,848 more words

Chocolate Pecan Pie

Image

Let’s get one thing straight about this pie, you will not want to share! I usually make this around the holidays with my mom and sisters, and we crank them out 4 at a time. And then gift them to our friends and family. Today, I was feeling extra cheery, or rather am getting used to not having homework to do, so decided… why not bake some chocolate pecan pies. They’re a treat for everyone. So tonight, on my relaxing Sunday afternoon/evening, I baked three chocolate pecan pies. One for my friend Hosana, we went grocery shopping together today, and I thought a pie at the office would be a nice Monday pick me up. The second pie I will bring to my grandmother’s for dessert tomorrow, and the third pie I’ll keep at home for my sister, myself and my roommates.

This chocolate pecan pie is so good you will not stop at just one slice. My family loves it when I make this for them. it’s a great combination of sweet and salty. I love to drizzle a little bit of semi sweet chocolate on top too, just to give it that extra chocolate-y loving. The recipe below is for one pie, although I usually bake two at a time if I am buying the frozen deep dish pie shells, since two come in one package.


Image

ImageImage

Chocolate Pecan Pie

Baking Temp: 325

Baking Time:  45min – 1 hr

Ingredients:

3 eggs

1 cup sugar

½ teaspoon vanilla

¼ teaspoon salt

¾ cup corn syrup

2 oz unsweetened chocolate

¼ cup of butter (½ stick)

Instructions:

First you want to add eggs to mixing bowl and mix on medium speed until frothy. Then add vanilla.

In a separate bowl melt chocolate and butter. I microwaved it for 1 to 1 ½ minutes, in 30 second increments to be sure the chocolate didn’t burn. Make sure the chocolate is cool before adding it to the eggs, you don’t want the high temperature of the chocolate to cook the eggs. Put this bowl to the side.

Next, add the sugar in with the eggs then add in salt and syrup. Mix together.

Last add in the chocolate and butter mixture, until all ingredients are combined. This does not take long, around 1 to 2 minutes. Don’t over mix the batter.

In your frozen pie shells, pour in 1 cup of pecans. Then add 1/2 cup of the batter on top of pecans. Add in the last 1/2 cup of pecans on top of batter. Then add another 1 to 1 1/2 cups of batter on top of the pecans.

The pie will cook for 45 minutes to 1 hour. After the first thirty minutes of baking, remove pie and cover with aluminum foil, this will prevent the pie from burning on top.

Let cool for 20-30 minutes and then you can serve or save for later. No need to refrigerate.

 ImageImage

Image

Chocolate White Chocolate Chip Cookies

Image

These cookies are just what any chocolate lover needs, decedent and delicious. I love baking cookies because they are so simple. The ingredients can easily be found in any regular baker’s pantry, and cookies are easily adapted by changing the type of chocolate chips or adding nuts or sprinkles. I was in the mood for something chocolate-y, plus tomorrow my family and I are going to be going to see Think Like A Man 2, and I wanted to make sure we had some homemade snacks to bring in addition to the popcorn! Also, when my family goes to the movies, we usually take up close to half or a whole row, depends on how many of us are going.

This cookie recipe was what I found on Pinterest, and I especially liked it because it used whole milk and no eggs. I needed to use up my milk that’s been in the fridge and had a little more than half a package of white chocolate chips in my pantry, so that’s particularly why I chose this recipe.

Here is the link to the recipeI found on Pinterest., and the only thing I did differently was I added in ½ cup of milk chocolate chips in addition to the 1 ½ cup of white chocolate chips.

Recipe adapted from Chez CateyLou blog – http://chezcateylou.com/2013/06/13/oreo-inspired-cookies-chewy-chocolate-white-chocolate-chip-cookies/


Image

Image      


Ingredients

1 ¼ cups all purpose flour

1 teaspoon baking powder

½ teaspoon salt

2/3 cup cocoa powder

½ cup (1 stick) butter at room temperature

½ cup sugar

1 ½ teaspoon vanilla

1/3 cup whole milk

1 ½ cups white chocolate chips

½ cup milk chocolate chips


Instructions:

First you want to whisk together the flour, baking powder, sat and cocoa powder

Then in a separate mixing bowl beat butter until smooth and fluffy

Add sugars in with butter then mix in vanilla

Add in about half of the flour mixture to the creamed butter and sugar, then pour in the milk

Add the rest of the dry ingredients plus the chocolate chips until well incorporated

Chill dough in freezer for 15 minutes

Take out the freezer and scoop about 1 ½ tablespoon into your hand (I use coconut oil spray to grease the spoon I’m scooping with)

Put dough in your hands and roll into a ball, then put on cookie pan and press down, making it a round cookie shape

Bake at 325 degrees for 13 to 17 minutes.

Let cool for about 20 to 25 minutes. Eat and enjoy!

Image

Image

Image

Image